Run an event automatically when a record is created, updated or deleted in a Twidget table. For example, send a welcome message after adding a customer, or refresh a summary when an order changes.
Create an event containing the steps you want to run. Add an Object input named trigger, then publish the event before choosing it in the trigger settings.
Under Inputs, select Add Input, name it trigger, and choose Object. The input appears in the event editor as shown below.
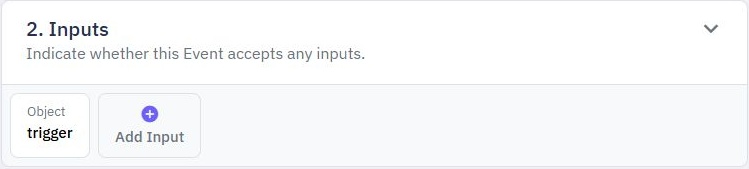
The event's schedule is separate from its trigger. Turn the schedule off if the event should only run when records change.
If an older event is rejected when saving the trigger, open and republish it first. Deleting the selected event disables its triggers; choose and publish a replacement event before enabling them again. Copied or cloned trigger settings start disabled, so review them before enabling them in their new location.
The trigger input contains:
operation: INSERT for a created record, UPDATE for a changed record, or DELETE for a deleted record.
tableId: the table that changed.
oldRecord: the record before the change, when available.
newRecord: the record after the change, when available.
Use the existing variable selector to pick these values in the event's commands. A new record has no previous record; a deleted record has no remaining record.
Open Database and choose the table whose changes should run your event.
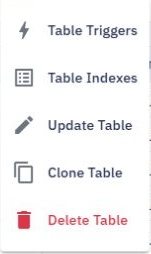
Open the table's options menu and select Table Triggers.
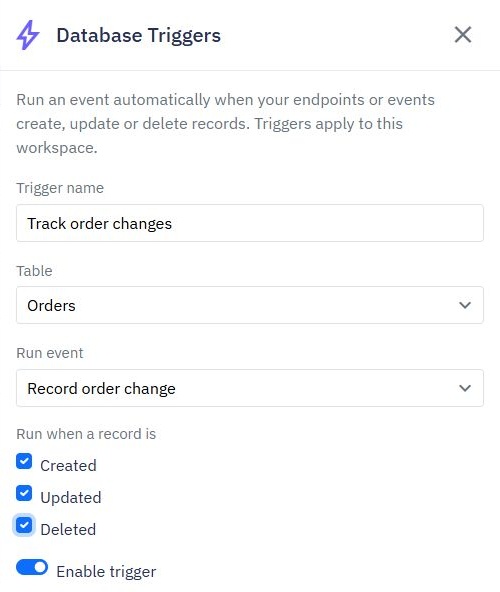
In the panel that opens, select Add database trigger. The current table is already selected.
Enter a Trigger name and choose the published event in Run event.
Under Run when a record is, select Created, Updated, Deleted, or a combination.
Select Enable trigger, then save.
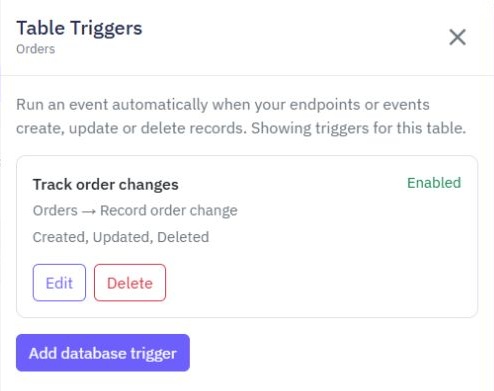
Table Triggers opens its own panel and shows triggers for the selected table. You can open it from the table's menu on the Database list or from the table page. Table Indexes is a separate option in the same menu.
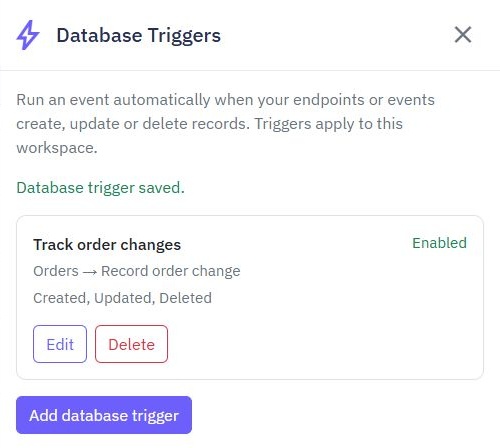
The panel title identifies the selected table. This example shows the Orders trigger and its edit, delete and add controls.
When editing a saved trigger, its table stays fixed; create a new trigger if you need a different table. To review triggers across the workspace, use Settings → Database Triggers. When adding a trigger from that workspace overview, choose its Table.
Disable the trigger when you want to pause automatic runs without deleting its settings.
This example runs Record order change after an order is created, updated or deleted.
After saving, review the selected table, event, operations and Enabled state in the trigger list.
Triggers respond to changes made by database commands in live endpoints and events. Editing records directly in the table editor, importing records and running workflow tests do not fire these triggers. Changes made by a triggered event do not start further database triggers, helping prevent a repeating chain of events.
Changes inside a Database Transaction start their events after the transaction completes successfully. A rolled-back transaction does not start its events.
An event failure does not undo a record that has already been saved. Automatic event delivery is best effort: review failed runs and decide how your workflow should recover rather than assuming a failed event is automatically retried.
Triggered changes require transaction support in the workspace's environment. Keep each changing command to at most 100 affected records; divide larger jobs into smaller batches. Ask your administrator if a local or self-hosted environment needs configuration.
Review the event's run history when checking its behaviour. Keep the event focused and handle errors where a later step depends on an external service. Confirm your trigger using sample records in a development workspace before relying on it for customer workflows.
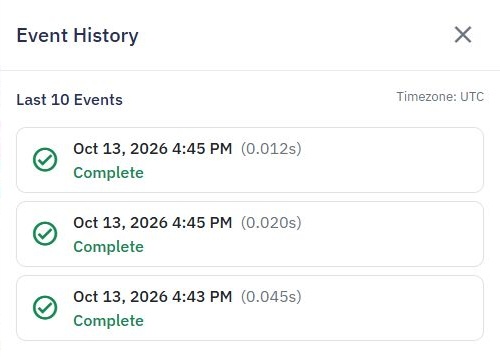
In this sample, one create, one update and one delete produced three completed event runs. Open a run to review its details and check that the event made the changes you expected.
Summarise Records
Use Summarize Records when you need a summary rather than a list of every record. Create a summary. 1. Add Summarize Records to your workflow. 2. Choose the table and add filters if you only want some records. 3. Open Output and add a calculation. 4. Choose Count, Sum, Average, Lowest or Highest. 5....
Export Data from Tables
Twidget allows you to export data from your database tables to a CSV file. This feature supports the export of both complete and filtered datasets. Here’s how you can utilize this functionality: Features. - Format: Export data in CSV format. - Data Handling: Object and list data types within your ta...
Generate CRUD Endpoints
With Twidget, you can efficiently generate CRUD (Create, Read, Update, Delete) endpoints for your database tables upon their creation. This functionality is designed to streamline the development process and ensure that essential API operations are readily available. Enabling CRUD Endpoints. 1. Crea...
Related Records
Include related information in the same result instead of adding a separate lookup for each record in a list. Example: orders with customers. Suppose your Orders table stores a `customerId`, and your Customers table contains the corresponding customer record. 1. Add Get Multiple Data and select Orde...
Database Storage
Managing your database storage effectively is crucial for ensuring optimal performance and cost-efficiency when using Twidget. Each entry within your database table utilizes a certain amount of storage space. Twidget provides intuitive tools to help you monitor and manage this storage. Viewing Datab...