


Database Imports
Import CSV data into a Twidget table.
Recorded with an earlier Twidget interface. Names, control locations and available options may differ; use the linked documentation for current guidance.
Watch tutorial (1:46)
Import CSV data into a Twidget table.
Recorded with an earlier Twidget interface. Names, control locations and available options may differ; use the linked documentation for current guidance.
Watch tutorial (1:46)Twidget enables seamless import of data from a CSV file into your database. Follow the steps below to successfully import a CSV file.
Initiate the Import:
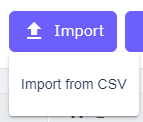
Click on the Import button within the table toolbar.
Select Import from CSV from the dropdown.
Open Import Dialog:
A new import dialog will appear.
Click on the Choose File button and select your CSV file from your local storage.

Preview CSV Data:
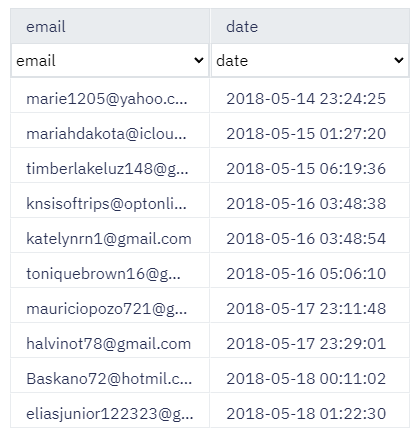
After selecting your file, you will be able to preview the first 10 rows of your CSV.
This provides an opportunity to ensure your data looks correct before importing.
Map CSV Columns to Table Fields:
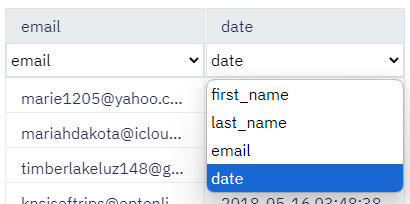
The dialog will automatically map CSV column headings to table fields if there is a match.
Any headings that do not match an existing table field need to be manually mapped by selecting the appropriate table field.
Headings not mapped or duplicated will be highlighted in red.
Note: You cannot import fields that are of type
ListorObject.
Create Missing Columns:
Complete the Import:
Automatic vs. Manual Mapping: While Twidget automatically maps matching column headings, ensure to review each mapping for accuracy.
Field Restrictions: Remember, List and Object fields cannot be imported. All other fields should be correctly mapped.
Pre-import Preparation: Verify and create any columns that are not currently existing in your table to make sure data is not lost during the import.
Summarise Records
Use Summarize Records when you need a summary rather than a list of every record. Create a summary. 1. Add Summarize Records to your workflow. 2. Choose the table and add filters if you only want some records. 3. Open Output and add a calculation. 4. Choose Count, Sum, Average, Lowest or Highest. 5....
Database Change Triggers
Run an event automatically when a record is created, updated or deleted in a Twidget table. For example, send a welcome message after adding a customer, or refresh a summary when an order changes. Prepare the event. Create an event containing the steps you want to run. Add an Object input named `tri...
Adding Database Table Rows
In Twidget, you can easily add new entries (rows) to your database tables. This feature allows you to expand your data dynamically without the need for complex coding. This document provides a step-by-step guide on how to add rows to your database tables. Adding a New Entry to a Table. To add a new ...
Table Relationships
In Twidget, you can connect database table data using the `_id` field that is automatically generated for every row in a table. This `_id` field is essential for creating and maintaining relationships across different tables. Types of Relationships. A one-to-one relationship occurs when a single row...
Related Records
Include related information in the same result instead of adding a separate lookup for each record in a list. Example: orders with customers. Suppose your Orders table stores a `customerId`, and your Customers table contains the corresponding customer record. 1. Add Get Multiple Data and select Orde...